Table Of Content
Taking the time to measure carefully and work patiently will ensure a cutting board that you’ll be proud to show off and use for years to come. Remember, always prioritize safety when using power tools. Wear protective eyewear, use push sticks to keep fingers away from blades, and work in a well-ventilated area. Take your time to measure twice and cut once to ensure the best outcome for your DIY end grain cutting board. Regardless of your cutting surface, repeated cutting will eventually dull any knife.
Step 1: Plane the boards to a uniform thickness
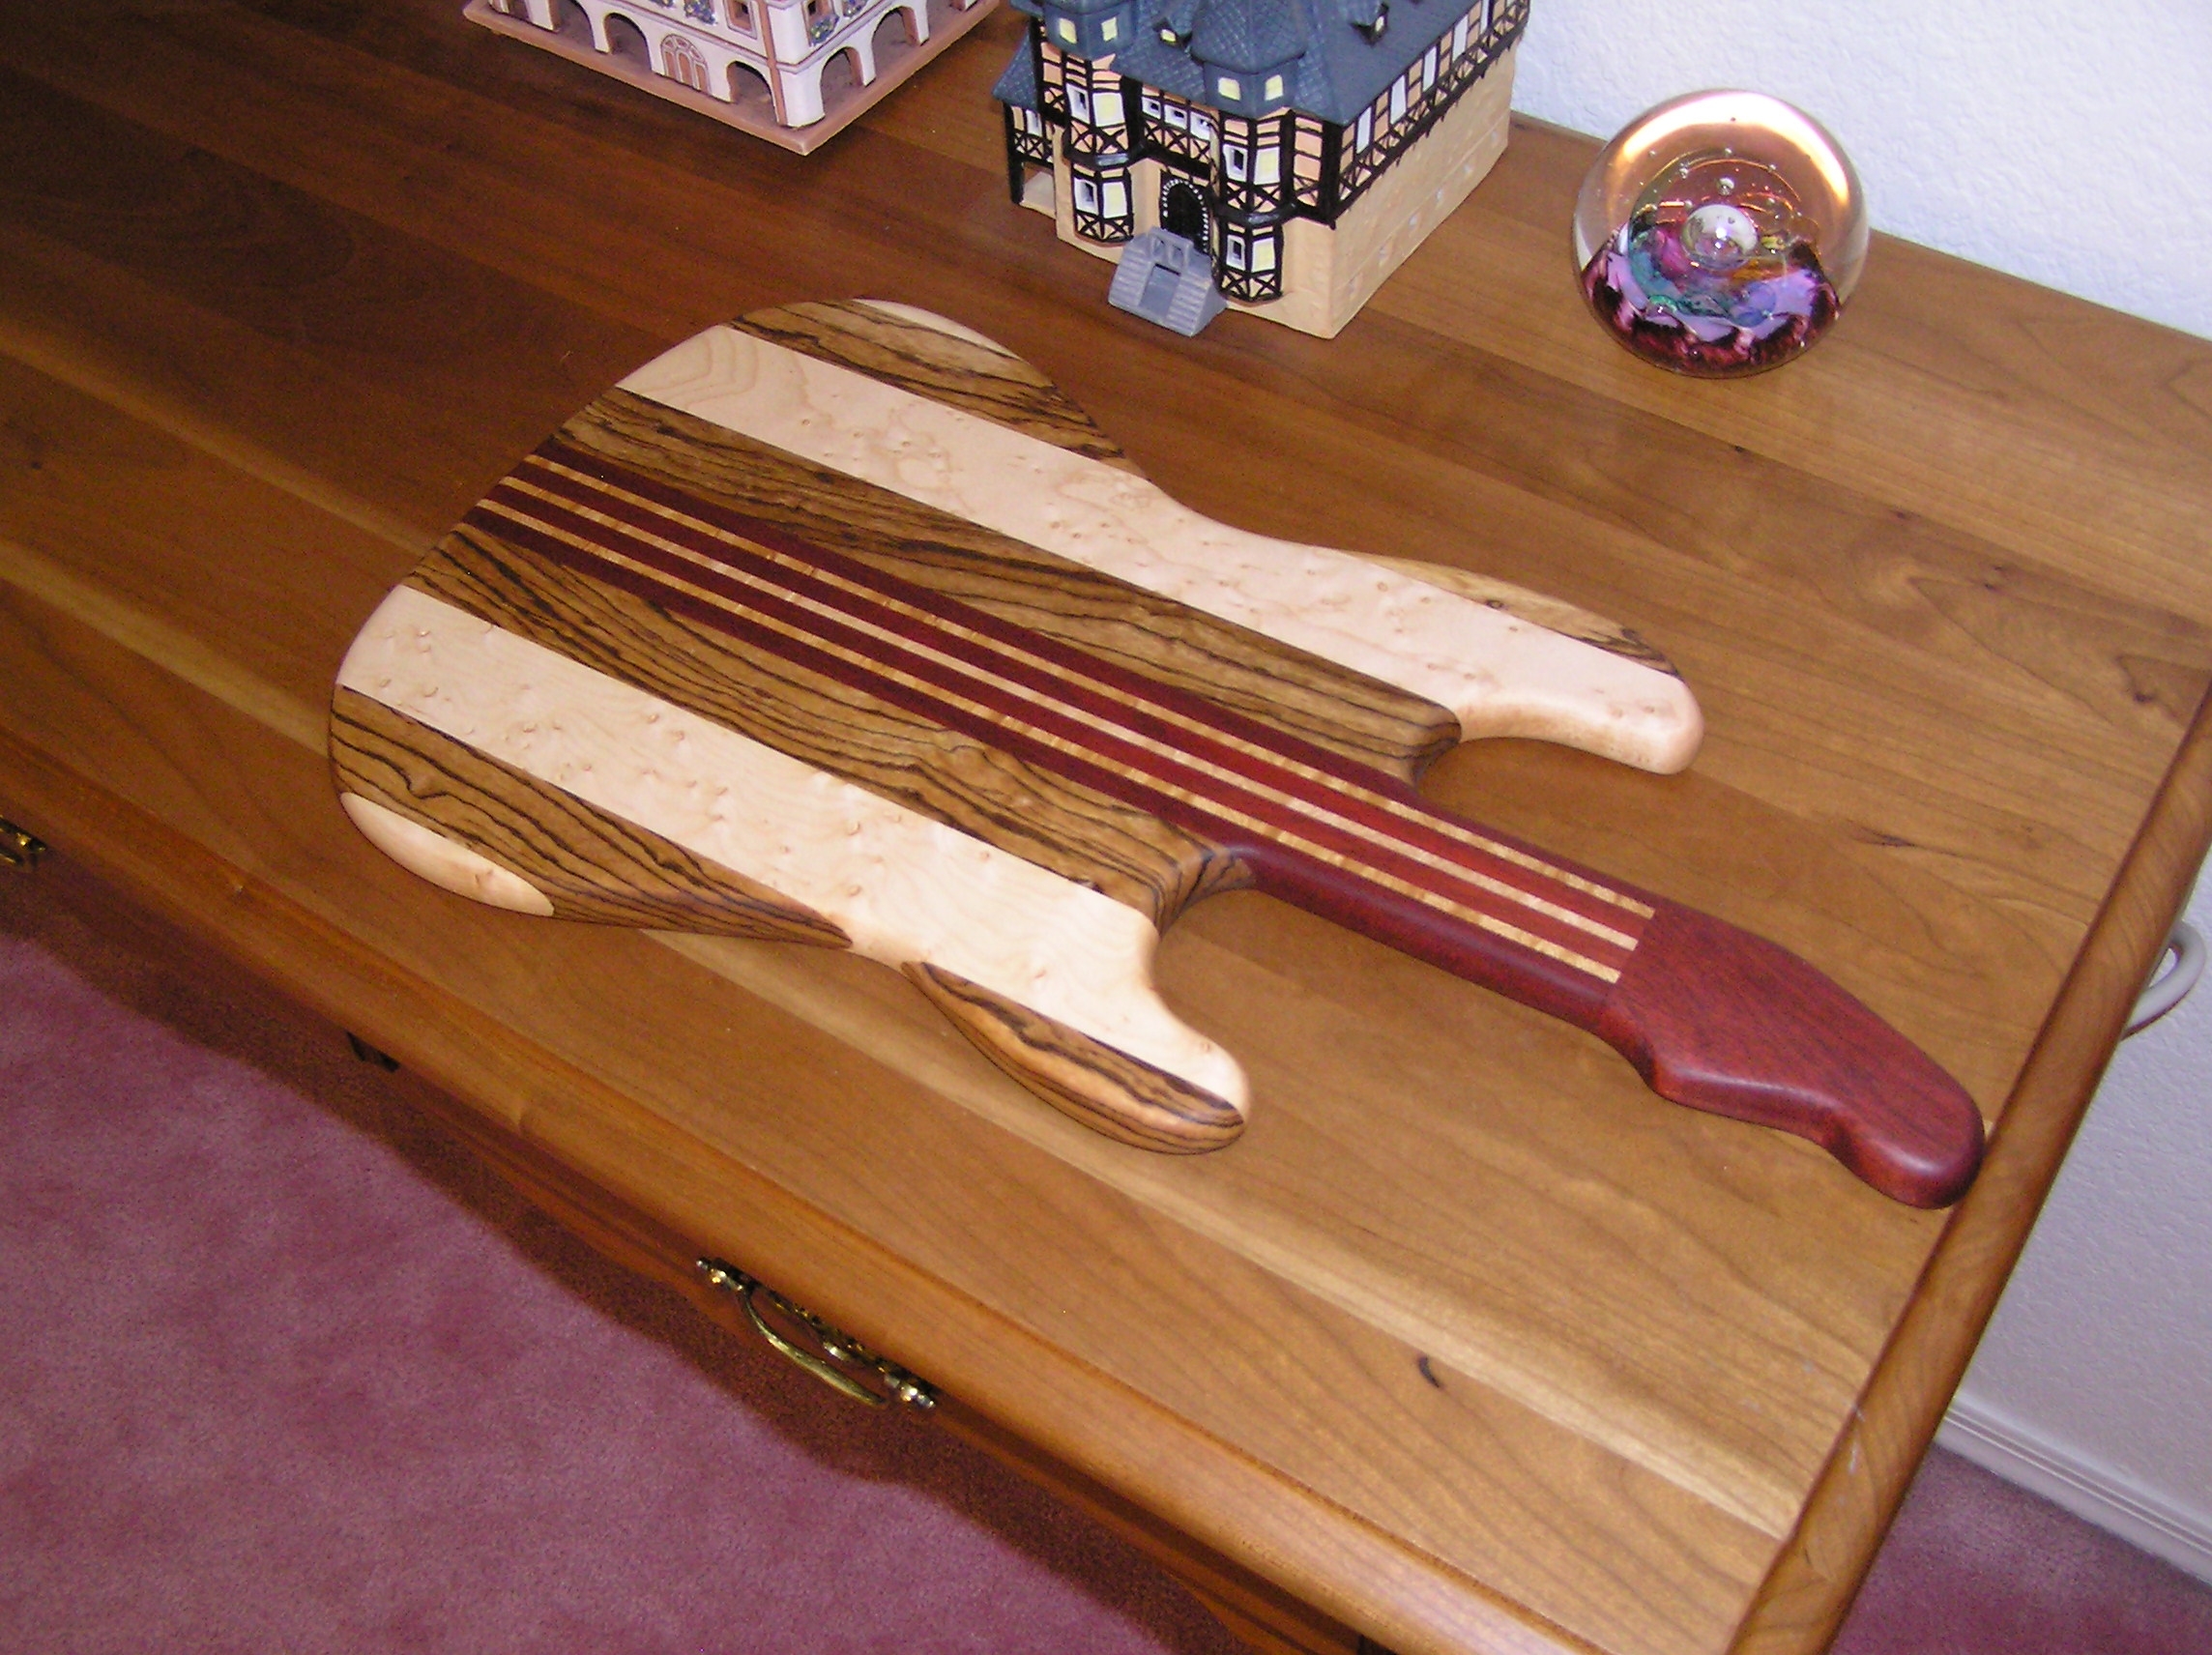
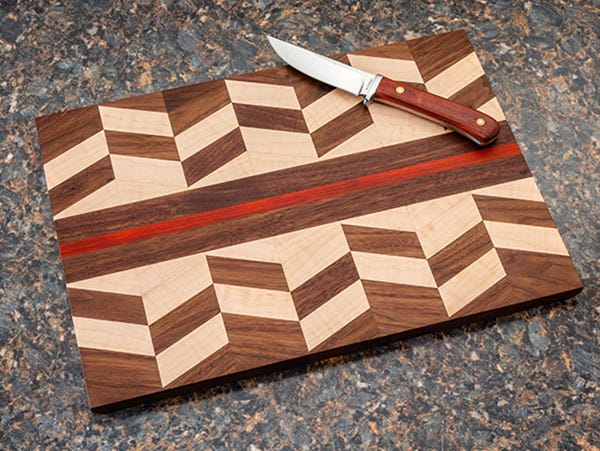
Some examples of intricate designs include geometric shapes, interlocking puzzles, and intricate inlays. To achieve some of these designs, you’ll need to use different types of woods with varying textures and colors. By using a combination of woods, you can achieve a beautiful and more striking cutting board. In conclusion, cutting board use and care are crucial for maintaining a clean and bacteria-free kitchen environment. With the right steps, you can ensure the longevity of your cutting board and keep your family safe from foodborne illnesses. One of the most important steps in cutting board care is keeping them clean and sanitized.
DIY Cutting Board With Wood and Marble
Whether you have a wooden, plastic, or bamboo cutting board, the following tips will help you keep them in top condition. If you are looking for a more intricate design for your DIY cutting board gift, using a wood burner may be the way to go. This tool allows you to create detailed designs such as typography, patterns, and other decorations on the surface of the cutting board. From a personalized design to a decorative pattern, the possibilities are endless, and the result is a unique gift that will be cherished for years to come. Achieving a smooth and polished surface is crucial to the overall appearance of your DIY cutting board.
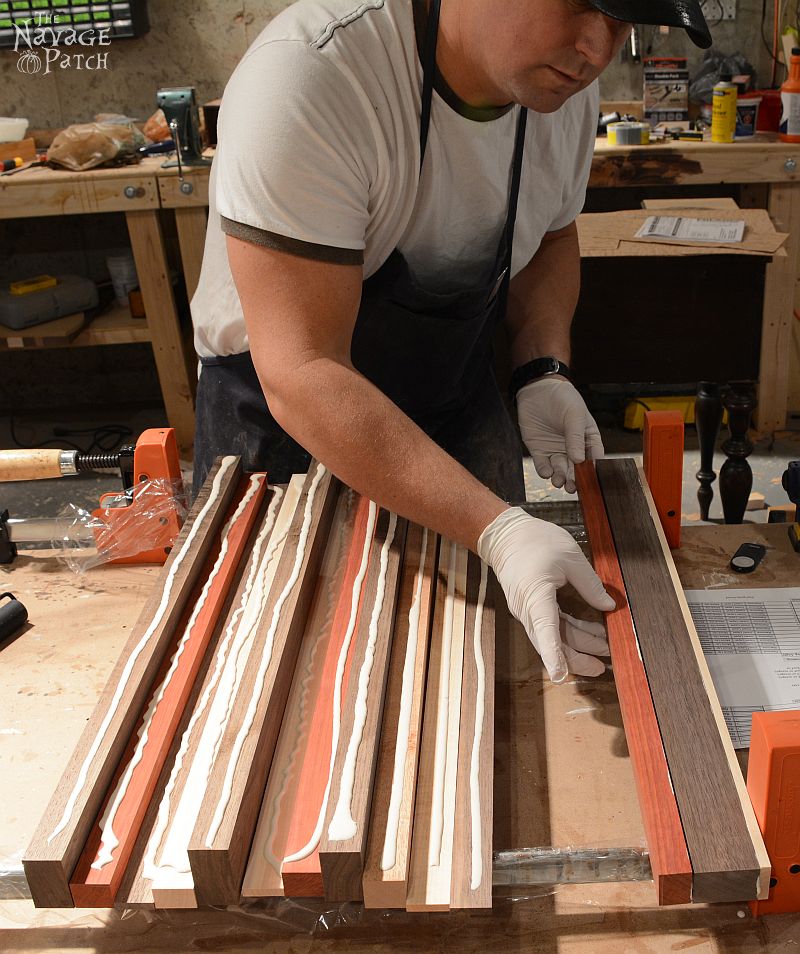
Step 5: Assemble the Pattern
Take a look at these excellent cutting board designs that we’ve dug up for you. There is much debate about which cutting boards are the best. When used and cleaned correctly, both plastic and wood cutting boards can resist harboring bacteria and last a long time. The best cutting boards are well-maintained and replaced when needed. Both plastic and wood can sustain nicks and grooves from frequent cutting, and in some cases, boards can break or crack.
Others are more challenging and require some woodworking knowledge, such as a knife block cutting board or a walnut board with brass inlay. But don’t worry, each DIY cutting board plan has clear instructions and sometimes videos to help you complete your project successfully, no matter how experienced you are. Making your own homemade cutting boards is a rewarding woodworking project. Learn how to make a cutting board with these 40 free DIY cutting board ideas and plans to add a useful tool to your kitchen.
Make End Grain Cutting Boards
Watch now and elevate your culinary space with a touch of handcrafted charm. For minor warps, you can try to flatten the board by moistening the concave side and clamping it to a flat surface as it dries. For cracks, they can sometimes be repaired with wood glue and clamping. However, if the damage is extensive, it might be safer to make a new one.
Siblings who wowed on 'Shark Tank' with dad's invention sell out at Williams-Sonoma - Good Morning America
Siblings who wowed on 'Shark Tank' with dad's invention sell out at Williams-Sonoma.
Posted: Wed, 26 Feb 2020 08:00:00 GMT [source]
To ensure your DIY wooden cutting board lasts for years to come, always wipe clean with a damp cloth and thoroughly dry after use. Frequently reapply mineral oil to prevent bacteria growth and occasionally wax the board to create a water barrier. Second in importance to the type of wood is the layout of the wood—three options being edge grain, face grain, and end grain. Think of edge grain as the short side of a board, with face grain being the wider top, and end grain being the rough end of a board. To flatten the end-grain on a cutting board, you can safely use a drum sander or a router sled.
Scituate woodworker turns small business into career, passion - The Patriot Ledger
Scituate woodworker turns small business into career, passion.
Posted: Sat, 27 Mar 2021 07:00:00 GMT [source]
This DIY guide is perfect for those with an interest in woodworking and upcycling materials. The video walks you through the process step-by-step, from selecting suitable wood scraps to the final touches of oil finishing. In conclusion, making your own cutting board is a fun and creative way to personalize your kitchen. You can choose from a variety of materials, shapes, sizes, and designs to suit your style and needs.
Use some thick but flexible rubber to back your sandpaper. I use an old rubber mat, which makes the curves smoother and also fits inside small spaces. Note that I clamped the board in a nice vertical position here. All finishes are nontoxic once dry, despite popular belief. If you've never used a router or don't have access to one, you can also achieve a nice edge with an orbital sander. To burnish wood, vigorously rub the workpiece with handplane shavings for a glass-smooth finish.
While cutting boards are available in many materials, including wood, glass and ceramic, we’ve focused on plastic for its durability, lightweight construction and versatility. Cutting boards are pretty simple in design, basically putting the wood on display, so look for a board that is special-looking on its own. A lot of people spend a lot of time talking about the safest woods and finishes for cutting boards, but it’s really not that scary or complicated. Rosewood, cocobolo, sassafras, yew, and olivewood are a few to watch out for, but those are rare anyway and almost any other hardwood is OK.
It is also important to use good-quality wood glue and to apply a generous amount. This DIY woodworking project is a great way to create unique and personalized gifts for family and friends. With over 1000+ crafts and projects, I Always Pick the Thimble makes exploring new crafting techniques easy. It’s an engaging, eco-friendly project that’s as rewarding to make as it is to use. Perfect for those who appreciate upcycling, woodworking, or simply want a unique addition to their kitchen.
An end-grain cutting board is a durable and attractive option that shows off the grain and natural beauty of wood. With this design, the end grain of the wood faces up, creating a textured surface perfect for slicing and dicing. To make this board, cut your wood into strips and glue them together on their ends, then sand and finish the board.
After each use, rinse the board with warm, soapy water, and dry it thoroughly with a paper towel or clean cloth. Avoid soaking wooden cutting boards as they can absorb water and warp. If you’re dealing with tough stains or odors, you can use a paste of baking soda and water to scrub the board clean. To safely flatten an end-grain cutting board, follow the steps outlined in this video by Caleb’s Fine Woodworking.


No comments:
Post a Comment